
I’ve always been a proud toolbox owner. When I left home my Dad furnished me with a little ‘starter’ pack, he incidentally taught me everything I know – I really can’t take much credit for my knowledge. By the time I owned my first flat I’d amassed a pretty hefty tool collection, being an odd job lover it was something I felt rather proud of! I used it to remove wardrobes, build doors, refinish floors and tile my little bathroom.
During the last reno my collection ballooned, I probably had more tools than the builders brought in to do the job. At one point, much to their surprise, I was lending them tools! They would often peer over, rather bemused at this little 5ftnot-much girl ripping out, painting or moving something or other. I think I rather perplexed them as they chuckled between themselves at my efforts but then granted me an ever conservative but extremely sought after builders nod of respect once the job was done. I am going to tell myself they chuckled affectionately though I may be wrong…
As a rule, when it comes to DIY I like to and try and do as much as I can myself. The only thing that generally stops me is a lack of strength or simply needing two pairs of hands. My husband, who should know me better by now, constantly takes the piss when my answer to most DIY jobs is ‘I can do that’. A disbelief from him is a red rag for me, proving your husband wrong is a great feeling…
On the whole, it’s probably down to impatience, when I want something done I can’t wait. I could never last a week twiddling my thumbs until an odd job man arrived or worse still – pay someone to do something I knew I was capable of. Plus I enjoy it.
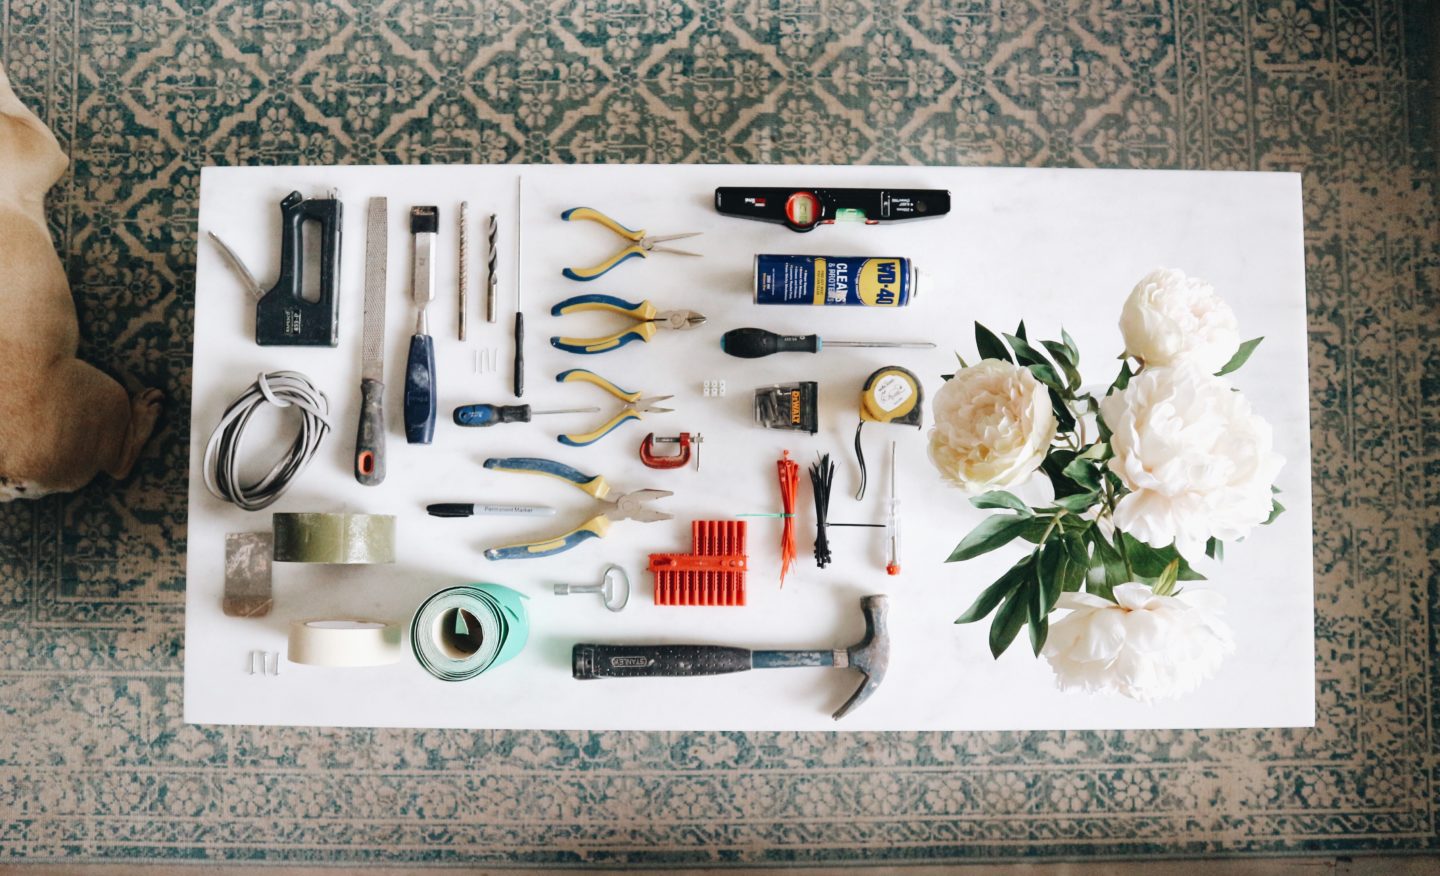
Packing up this place though, it has come to my attention I probably have too many tools for a 35 year old female…or not. Either way, there’s no escaping the fact I can’t face transporting all my overflowing tool boxes, bags, work bench and pretty hefty actual toolbox, to The Manor. Therefore, a clear out is needed and with that in mind, I’m putting together an ultimate, paired down toolbox that will see me through most jobs.
Hammer
If you have nothing else, make sure you have a hammer, at least then you can compete with the gallery walls on Insta 😂. Putting up pictures was the first DIY I was allowed to do at the tender age of about 6. My poor dad would hold the nail for me and I would try my hardest to aim well. Don’t forget hammers are great for getting nails out too! If, like me you are a little overzealous and too impatient to measure your wall properly this comes in handy.
Sandpaper
Mostly for rubbing down filler after you’ve filled up holes left by nails you put in the wrong places! Sandpaper is great for window frames and furniture you want to paint. I’ve also used it on the bottom of doors when they expand and stick. Ideally, you want larger and a smaller grain paper. Use the larger the grain to really make a difference and then a smaller grain to smooth up a finish. You can also scuff up the slippery soles of new heels so so you don’t slip arse over tit and renew wooden chopping boards!
Masking tape
This should need no introduction – for painting, for holding things together, labelling, making roads for toy cars..
Nails and screws
Ideally a mixture of sizes for a mixture of uses. Shelves, pictures, putting up Christmas decorations and all important bunting…
Scraper
One small and one larger for mixing filler and filling holes. A scraper is also great for getting off dried paint splatter or dripped filler off of smoother surfaces etc.
Wire
I often rewire things where needed, especially if you want an electrical appliance (ugly hairdryers) to live in and work from a cupboard for example. So having some spare wire is always handy. I actually taught my husband to re-wire a plug! To my surprise he had never knew you could! I’m sure I learnt to in school…

Staple Gun
Great for anything you may want to cover in material.
File
If you have a tendency to saw things, like I do, a file is a great way of nipping off spikey ends before you sand.
Chisel
I added a chisel to my toolbox when a replacement lock I bought wouldn’t fit the door. I really couldn’t be bothered to get back in the car and exchange it so I used the chisel to make the lock cavity larger instead – cavity – look at me going all builder talk! As well as fitting locks, if you’re removing things like built-in wardrobes or cupboarding a chisel can be really handy to get stubborn bits of wood to loosen. You can also start carving your own sculptures to rival those in Homesense if you fancy it!
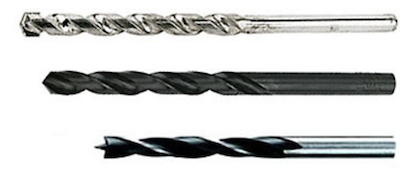
Large drill bits
I’m not too keen on using the drill but no one can deny how useful they are. I have a few specialist drill bits for things like metal, stone and plasterboard. It’s always good to know which drill bit to use for the right material as you’ll save yourself a lot of time and mess. You can tell their use by the shape of their heads. Below the top is a Masonry bit: brick, cement, concrete & plasterboard (looks like it has a hat on). THe middle is a HSS wood/metal bit: general purpose, wood, metal (looks like the roof of a house). And finally, the bottom one is a Wood bit: wood, plasterboard (looks scary).
Screw Drivers
Although our drill doubles up as a screwdriver and is MUCH easier and faster it’s still always good to have hand power ones too. You don’t want to over screw a screw! The head will wear away or it spins around so much it loses it’s grip. Plus handheld is needed for battery compartments, plugs, light fitting and more. At least one standard cross and one flathead will fit most things and then maybe a mini of each if you have lots of toys in the house!
Pliers and Pincers (as my Dad calls them)
For nipping and snipping. I have a collection of sizes and shapes. The snippers will snip things like wire and the pliers will give you grip when you need it. That plug you can’t get out the wall? Pliers. That old phone line, welded under the windowsill with gloss paint? Pliers… That knut and bolt you can’t tighten? Pliers. You get the idea.
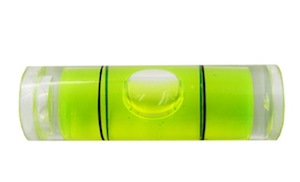
Spirit Level
You want yourself a picture wall that’s better than mine? You need a spirit level. You want to check for a wonky floor before you buy a place? Take your spirit level. When the bubble is between the two lines it’s level.
WD40
Always worth a try when things are stiff. Whether it’s a ring stuck on your finger, glassware that’s stuck together, a stiff or squeaky door hinge… Apparently, it even get’s chewing gum out of hair but don’t quote me on that.
Cable Connectors
For putting up lights and extending cables. Sometimes they come with your new light fitting, sometimes they don’t. This avoids disappointment and impatience.
Tape Measure
Obvs
Cable ties
So useful for organising. Also for training plants up walls and to sticks and closing Tank shaped holes in garden fences… You can even use them to childproof cupboards by tying the handles together and as makeshift bubble wands with homemade bubble mixture (water, Fairy, Glyceryn).
Mains Tester Screw Driver
Test wires for electricity safely. Hold the end of the screwdriver on the suspect wire and touch your finger on the red end of the handle (always only hold the plastic handle). If the light comes on there’s electricity. If it doesn’t it’s safe.
Clamp
The picture shows my mini clamp, I have three sizes! These will hold pieces of wood to tables so you can saw them without a wiggle. Or they will hold things together whilst you wait for glue to dry for example.
Radiator Key
So handy if you live in the UK like me!! You want your rads to work! I’m probably telling you things you already know here, but if the top of a radiator is cold and won’t warm up it’s because of trapped air. You can sort this out by making sure the heating is off and the rad is cooled then using a radiator key to let the air out! Radiator keys are also universal.
P.S
The one thing I haven’t added here, which I will add when I find out what box I’ve packed it in is super glue – always have some super glue handy!