

A bathroom renovation can be any one of three levels. There is The Switch Over – a simple switching of the suites or taps or shower with main pipes and items remaining in the same place. The Reshuffle – here things are moved around, maybe a tap is placed into the wall rather than coming up from the sink or the shower is moved to a different corner. At this point you need to start thinking about piping and what’s behind walls. Then there is The Creation – making a whole new bathroom in a room that previously had no plumbing at all. This needs both some good planning and also strictly speaking, building regulations.
With a lot of these subjects I feel like there is almost too much to say so in the interest of not boring you to tears and trying to keep myself on track I’m breaking things up into these three levels of work. I’m focusing on the actual gubbins of the jobs here rather than looks, or buying, or finishes as there is just too much to say otherwise. I’ll split that off into different posts later on and link them in.
But first…..
The Switch Over
It’s important to note here that an easy switch over only works if the new components you choose to add are exactly the same when it comes to fitting. If they are it’s more than likely you can do all the work yourself. But you have to ensure that all the piping matches up. You can’t change a floor standing toilet for a wall hung one or a double tap for a mixer. Things have to slot into the same holes that are already there.
Having said that there is a lot you can do easily without calling anyone in.
- Shower heads can be unscrewed and replaced.
- Taps and handles can be unscrewed and replaced
- Push plugs can be unscrewed and replaced
- Overspill hole surrounds can be popped out and replaced
- Tiles can be painted or simply tiled over (taking into consideration any extra thickness that may alter whats on the wall already like doorframes).
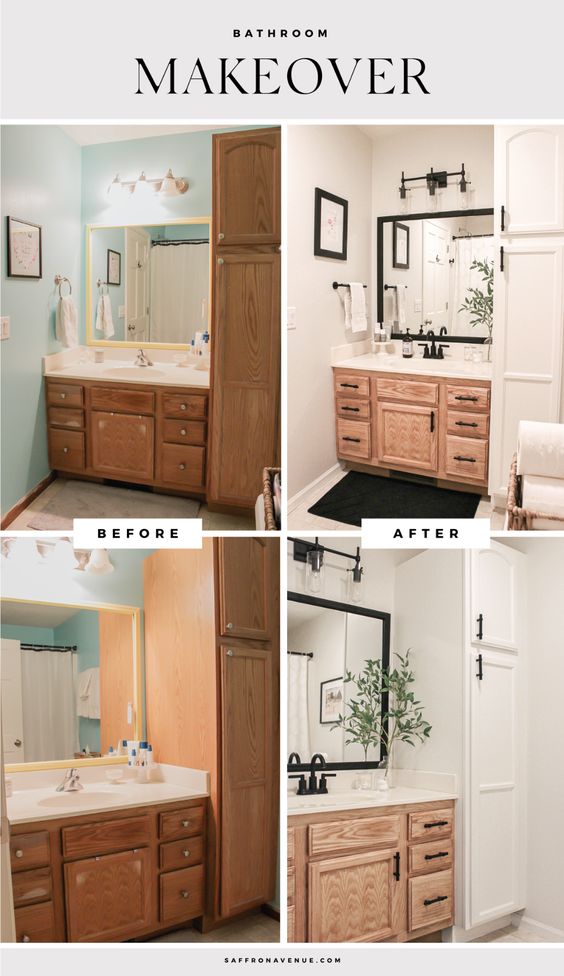
- Cabinets can be painted and re-handled
- floors can be retiled and or lino-ed or stripped back to bare wood.
- Wall lights can be changed (just make sure you turn off the power first!).
What to watch out for with the Switchover
- Measure, measure and measure again. Ensure you have heights and widths and depths that match what you currently want to replace.
- Look at technical drawings when ordering to ensure back ends are compatible with what you already have.
- Ideally turn off all water and electricity while working on anything water related or electricity related. Stop cocks are usually located out the back of your property, in the bathroom or downstairs in a cupboard.
- You need a professional to change over a radiator.
- Make sure any new taps come out the right distance to accommodate your sink or worktop width.
- Any new lights, whether they are simple bulb replacements or fittings must be bathroom rated.
The Reshuffle
Here we’re talking more than the old switcheroo. Here we move toilets, put pipes into walls retile and more. Here it’s worth noting that the less pipework you mess around with the more money you will save. So for example if you move the sink it would be good to switch it with the bath as there are already pies here for hot and cold water. It’s also worth noting that walls will need to be broken and possibly floors taken up if you are laying new pipework so account for tile removal and replacement which always works on a more tiles = more money basis. Also the smaller the tiles the more expensive to lay and the larger space you decide to have tiled or to remove tiles from the more expensive it will be too. More expensive still, and more time consuming are patterns. If you want a quick and cheap retile op for large square tiles every time. I’ll do a post on tiling alone later as there are a lot of factors to consider when it comes to budget, time and good finishes.

What to remember for a bathroom reshuffle:
- Try to base your reshuffle utilising pipelines that are already there. This will save you time and money.
- You can deviate from almost any pipe route accept the toilet waste pipe which is the largest and needs a drop of at least 18mm per meter of pipe, it also has to meet the main waste pipe for the house. A drop mean that it has to have enough of a slope on it for whatever’s inside to run away easily.
- Think about a slight drop on shower wastes too as although you don’t strictly need one for the shower to work you will get that nasty drain smell if water doesn’t easily flow away. If you are planning a walk in shower then space for a slight drop is a must.
- Don’t let a plumber tell you it’s hard to put a concealed shower in. Thats one where the controls and the shower head are separated and both come out of the wall independently. It doesn’t take long and isn’t a hard job. Just ensure that whatever shower controls you buy aren’t too deep for the wall cavity you have (the empty space between the wall of the bathroom and whatever room is the other side). Check the size shower control part that will be going into the wall. Usually you can look at the technical drawings online for this.
- Measure, measure and measure again. You need room for knees when you sit on a toilet (take larger people into consideration if you are small). You need to easily walk in and out of a shower or open and close a shower door. You need to make sure you don’t burn your knees on the towel rail when you sit on the toilet. Shower height for blokes is a big thing too. If you’re buying one of those vintage looking showers with the pipe attached to the head ensure the pipe is long enough for the handles and the head to be in the right places. This is especially important if you are looking at showers for baths with taps on the bottom of the shower pipe as you often need an extension pipe if you’re any sort of normal height.
- Concealed toilets are great for saving space but again, you need the right depth of wall cavity to place them or else you’ll have to build out a small box. If you’re happy with this and have space for it then no problem. You can use the top as a ledge or take the extra space all the way up the wall and make a cupboard above the toilet, extra storage in a bathroom is always a plus! Try to avoid the tiny flush buttons with floating toilets – although they are more aesthetically pleasing they don’t delivery a very powerful flush.
- If you intend to change a normal shower to a walk in one you need to ensure you have enough space under your floor for an underfloor shower tray, drop and pipes. Without this your bathroom will turn into a padding pool. Also ensure that builders silicone around where the base of the shower walls meet the floor tiles with an appropriately coloured sealer that is mould resistant.
- If you want to add underfloor heating this will need an isolation switch which has to be placed outside the bathroom and will need a clear run down to the fuse box wherever that may be. If this is not possible then you are not able to install underfloor heating. Underfloor heating matts can be found at a really good price off Amazon, they sell the controllers for half the price of places like Topps Tiles too. They are cheap, quick and easy to lay. You will just need an electrician to connect them up.

What to watch out for with the reshuffle:
New floors can mean gaps left under doors, doors that no longer open or thresholds not matching up so check, measure and think about this early on.
Removing tiles often leaves a mess of a wall needing new plasterboard. You can tile straight on to plaster board and if you intend to paint you will need it plastered or it is is put up by dot and dab you can easily just fill the joins, sand and paint, no plaster needed.
Once you start switching the bathroom around you need to ensure it’s up to spec so that means no dangly light switches inside the bathroom and a wired in extractor fan.
Again with the measuring! make sure everything fits where you want it to. It’s always a handy idea to use masking tape on the floor to block out where new items will go.
The Creation
You can create a new bathroom in almost any room of the house. Just keep in mind privacy (where does the window look out onto and what sort of privacy glass will you add here). As mentioned above toilet wastes need to tap into the main waste pipe so this is an important factor to think about. If your main waste pipe is the other side of a stairwell then you’re going to have an issue. That being said you could always have a macerator unit toilet, they are much quieter than they used to be but remember you will need a power source for this and another isolation switch.
Here a lot of the advice for the re-shuffle still comes into play. Measuring, taping out items to ensure you have enough space, space in walls for concealed cisterns (the part of the toilet that holds the water for the flush) and shower controls into walls for example.
- For a new bathroom you will need building control. This is most important when you come to sell, as you are not able to add new functional rooms to a floor plan without sign off – it will come up on your searches without a doubt so best do it from the start. We use London Building Control.
- Floorboards can be tiled upon once you add a layer of plywood to stop movement and again, with this you need to think about the thicknesses you are adding to the floor and how it will fit in with the floor in any adjoining space.
- Remember, you don’t have to have a tiled floor in a bathroom. We have the original floorboards in ours and a rug! make up your own rules here as you have the luxury to. You also don’t need any tiled walls, just bathroom paint should you want to save a bit of cash. We’ve not had tiles behind our basins or on bathroom walls (accept in the shower of course!) for 4 years and have never encountered an issue.
- If you are tiling, take into account walls that may not be straight and choose your tiles or tile pattern accordingly so as not to highlight an unintentionally angled floor space. Bare in mind you may need to add a skim (thin layer of plaster) to walls that are bumpy if you want to tile on these and they’re not flat.
- All electrical points must be removed and light switches placed outside of the room. Any ceiling lights will need to comply to bathroom regulations too. There are three zones of the bathroom that need to be taken into account.
- If you’re adding new wastes to the building, ie in our house we have a central waste pipe that goes down through the back corner of the sitting room as we extended at the same time, make sure it’s insulated so you don’t hear when anyone does their business.

You also want pipes ideally patched into a pipe commonly known as the ‘stink pipe’. This lets methane gasses out into the air above the house rather than giving them the chance to seep in through the pipes and drains and stick up your new bathroom.
If you’re putting a bathroom in at the top of the house and you have a combi boiler make sure it has enough welly to get hot water up there. The same goes if you are adding an extra bathroom to the house. Otherwise you may not be able to have all showers running at the same time, someone will get a cold surprise.
Go for a good, thick door if you’re putting your bathroom somewhere a little public like off of a kitchen or making an en-suite to ensure privacy and the same goes for the window info above. To change a pane of glass on a window isn’t hard for someone that knows what they’re doing. You can order the glass custom cut yourself and your builder can probably put it in fine for you. Alternatively there are loads of stick on privacy options these days. The Wholesale Glass Co and Made 2 Measure are great options.
Extractor fans are a must for building regs and these need to be wired in with an isolation switch outside the bathroom door. The extracted air will need to go somewhere too, this could be through an outside wall, up into and out through the roof or channeled into an unused chimney.
Again for the popular walk in showers you need to remember a floor drop in order for water to run smoothly away. Ideally you want a wet room shower tray placed under the floor, this is the best option we’ve found and using this plus water proof plaster board hasn’t turned up any leaks for us so far. We’re probably about 10 walk ins in. So don’t let Topps Tiles sell you all this extra lining and join tape. You’ll need to cut through floorboards or dig down to ensure you get enough depth. Don’t be tempted to risk having less of a drop than needed. To efficiently drain, the recommended minimum slope for a shower floor is about 4 percent, or a 1/2 inch drop per every 12 inches from the shower walls to the drain. You will 100% have issues if you skimp on this. Similarly make sure your shower screen is large enough and placed correctly to help ensure the bathroom doesn’t flood.
Currently that’s all I can think of! If there are any other questions or things you feel I have missed let me know in the comments below and I’ll do my best to answer!
Here ends the first rather long chapter of Reno 101!